
Introduction
Access to enough substrate variety can be a challenge when developing and testing Juju. Canonical employees have access to a few flavours of MAAS and with some help from IS, their own bastion for Openstack; but for most people the go-to option is the local LXD provider.
This post demonstrates how to set up a simple-as-possible MAAS deployment using KVM Pods, all resident on a single host.
There are some examples around of how to do this, but none of them were complete enough for me to follow by rote and get completely set up, so I thought I would document my experience here.
It may be necessary to reboot in-between some of the steps below, but I fudged about and cannot now remember precicely what worked.
Virtualisation
Our MAAS nodes will be KVMs, so we need to install prerequisites for that.
$ sudo apt install qemu-kvm libvirt-bin
If running ubuntu 18.10 or later, the libvirt-bin package has been replaced. Install these prerequisites instead.
$ sudo apt install qemu-kvm libvirt-daemon-system libvirt-clients bridge-utils
When these are installed, we need to check whether virtualisation is available to us.
$ kvm-ok
The output should look like this:
INFO: /dev/kvm exists
KVM acceleration can be used
If it does not, you may need to check your BIOS/UEFI and ensure that any CPU setting that controls virtualisation is enabled.
By default, we get a new bridge for KVMs, which we will leave untouched. We need a network for which MAAS will control DHCP, so we create a new one (source).
$ cat << EOF > maas.xml
<network>
  <name>maas</name>
  <forward mode='nat'/>
  <dns enable='no'/>
  <bridge name='virbr1' stp='off' delay='0'/>
  <ip address='172.16.99.1' netmask='255.255.255.0'/>
</network>
EOF
$ virsh net-define maas.xml
$ rm maas.xml
$ virsh net-start maas
$ virsh net-autostart maas
I had some issues from guests on this network. I could successfully get name resolution, but had no route to external hosts. Changing these settings got me around the issue:
sudo sysctl -w net.ipv4.conf.virbr1.proxy_arp=1
sudo sysctl -w net.ipv4.conf.virbr1.proxy_arp_pvlan=1
Note that you will have to add these to /etc/sysctl.conf to make them permanent, and networking needs to be restarted after the change.
sudo netplan apply
Next create a default storage pool.
NOTE: These instructions come from here, but I don’t believe they are necessary if you choose to install the 2.6-alpha MAAS Snap. MAAS creates its own storage pool for nodes it manages. I installed MAAS 2.5.1. They might also be unnecessary for this version. If someone tries without the pool and can confirm, I will remove this section.
virsh pool-define-as default dir - - - - "/var/lib/libvirt/images"
virsh pool-autostart default
virsh pool-start default
MAAS
At the time of writing, the MAAS Snap looks like this:
channels:
  stable:    2.3.3-6498-ge4db91d-snap        2018-06-15 (2589) 111MB -
  candidate: 2.3.3-6498-ge4db91d-snap        2018-06-15 (2589) 111MB -
  beta:      2.4.1-7032-g11e4fa3-snap        2018-08-15 (2654)  99MB -
  edge:      2.6.0~alpha1-7613-g38710e5-snap 2019-03-15 (3241) 107MB -
We want 2.5+, so going the Snap route means going bleeding edge. It does simplify set-up a little, so read on before making a choice.
The other option is installing from the stable MAAS PPA:
$ sudo apt-add-repository -yu ppa:maas/stable
$ sudo apt install maas
A maas user will be created for us at this time and we want to ensure that it is in the libvirt group in order to issue virtualisation commands.
$ sudo usermod -a -G libvirt maas
Next we want to initialise MAAS. If installing from the Snap, ensure that you use mode “all”. This will mean our host is both a region controller and a rack controller (read more here).
$ sudo maas init --mode all
Otherwise, omit the –mode option. In either case, just follow the prompts with sensible defaults.
Now you should be able to access http://localhost:5240/MAAS and do the initial setup for OS images, other users etc.
Networking
If installing from the Snap, one will notice that in the host’s capacity as a rack controller, the fabrics and subnets that we have access to are populated under the “Subnets” tab. Look at the “Controllers” tab. If we are not a “Region and rack controller”, we need to register ourselves as a rack controller.
Under the “Controllers” tab, click the “Add rack controller” button. Instructions will be shown; simply run them in a terminal. I modified the URL to use the loop-back address, so it was something like:
$ sudo maas-rack register --url http://localhost:5240/MAAS --secret whateveryoursecretis
After doing this, the “Subnets” tab will be populated with more than just a single empty fabric.
Now, identify the fabric that corresponds with the bridge network we created, by looking at its subnet (172.16.99.0/24). Click on the VLAN link, click “Take action” and choose “Provide DHCP”.
After ensuring that the host is a working rack controller, it may take some time to download and sync images. Until this is done, we won’t be able to provision nodes, so give it a little time - progress can be checked on the “Images” tab.
Conflicts with LXD
If you are running LXD, you may find that LXD containers no longer get IP addresses. In my case the bind9 package installed by MAAS was listening on all interfaces (as it does by default), which conflicted with the LXD Snap dnsmasq. Check this via:
$ sudo netstat -lnp | grep ":53 "
If named is listening on all interfaces (including the LXD bridge), edit the file /etc/bind/named.conf.options and tell it to listen only on the virbr1 interface. My edited file looks like this:
options { directory "/var/cache/bind";
auth-nxdomain no;
listen-on-v6 { none; };
listen-on { 172.16.99.1; };
include "/etc/bind/maas/named.conf.options.inside.maas"; };
Then restart bind with:
$ sudo systemctl restart bind9
Pods and Nodes
Now access the “Pods” tab and click “Add pod”. Give it a name, “default” for zone and pool, and “Virsh” for the pod type. For the Virsh address, you should be able to use:
qemu:///system
If MAAS cannot connect to the Virsh console, execute these steps, accepting the defaults (source).
$ sudo chsh -s /bin/bash maas
$ sudo su - maas
$ ssh-keygen -t rsa -N ''
$ cp .ssh/id_rsa.pub .ssh/authorized_keys
For a snap installed maas do:
$ sudo mkdir -p /var/snap/maas/current/root/.ssh
$ cd /var/snap/maas/current/root/.ssh
$ sudo ssh-keygen -f id_rsa
$ cat id_rsa.pub >> ~/.ssh/authorized_keys
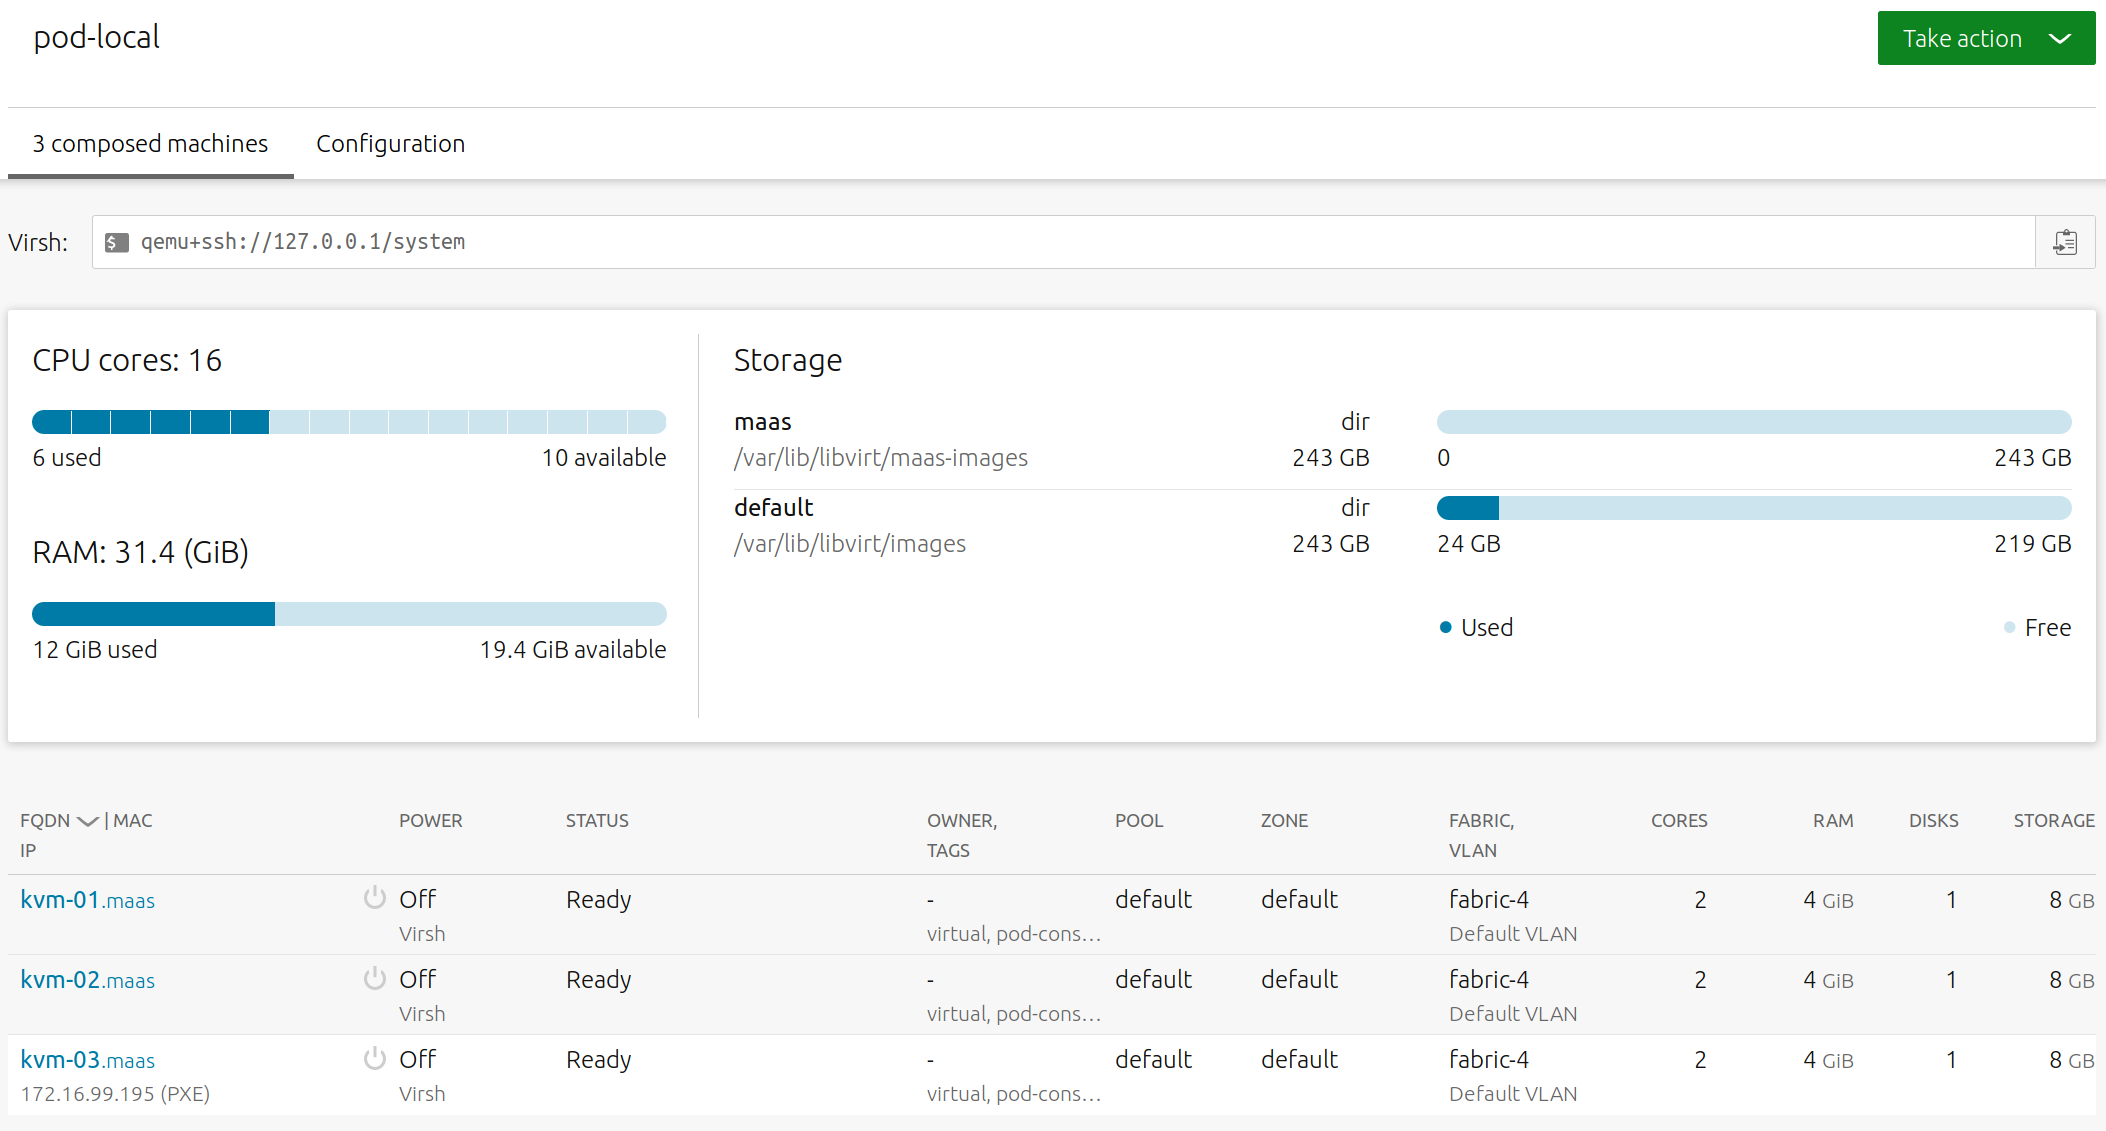
Then for the Virsh address, this should work:
qemu+ssh://127.0.0.1/system
Now that we have a pod, all that remains is to commission some KVMs. Click on the new pod link, click “Take action” and choose “Compose”. In this way, I created 3 nodes with minimum 2 CPUs, 4GB memory and 8GB storage. Obviously this will vary based on requirements and available resources.
Now those nodes can be deployed, and your new local MAAS added as a Juju cloud. Use the virbr1 bridge for the MAAS address so that the Juju cloud looks like this:
  localmaas:
    type: maas
    auth-types: [oauth1]
    endpoint: http://172.16.99.1:5240/MAAS
One last point. With my firewall enabled, commissioning and deploying both time out. I am in the process of determining what access needs to be granted. I will edit this post with the new information when I have it.
