
This document shows how to integrate Charmed Kubeflow with MLflow. This will allow you to store model objects in the MLflow model registry server, enabling you to achieve true automated model lifecycle management.
Contents:
- Deploy Charmed MLflow
- Integrate Charmed Kubeflow with Charmed MLflow
- Access the MLflow dashboard
- Run an example model with Kubeflow
- Access Artifacts
Deploy Charmed MLflow
In a terminal window, deploy mlflow-server and charmed-osm-mariadb-k8s as its relational database, mlflow-db:
juju deploy mlflow-server
juju deploy charmed-osm-mariadb-k8s mlflow-db
See more: Charmhub | MLflow Server
Run watch juju status to watch the application status of mlflow-db become active and mlflow-server to be waiting for the relation data. This takes about a minute.
Integrate Charmed Kubeflow with Charmed MLflow
Integrate mflow-server with mlflow-db. This will ensure that MLflow has a relational dabatase connection to MariaDB. Also integrate mlflow-server with the minio, admission-webhook, and istio-pilot components of Charmed Kubeflow (that were already deployed when you deployed Charmed Kubeflow). minio will give MLflow server access to the object storage; admission-webhook will give user the ability to connect to MLFlow through secrets; and istio-pilot will connect MLflow to Istio.
juju relate mlflow-server mlflow-db
juju relate mlflow-server minio
juju relate mlflow-server istio-pilot
juju relate mlflow-server admission-webhook
Run watch juju status --relations to see the relations that you have created. While the relations are created almost immediately, you should wait a few minutes for the mlflow-server unit to have active status so you can access the dashboard next.
Access the MLflow dashboard
Find the external IP address. To find the external IP address of the MLflow dashboard, do all of the following:
If you’re using MicroK8s:
The MLflow dashboard is always available at
http://10.64.140.43.nip.io/mlflow/#/. You may skip to the end of this section and use this IP to access the dashboard.
- Set up the Load Balance Controller for your Kubernetes cluster. The exact way to do this will depend on the cluster.
If you’re using MicroK8s:
You can set it up by enabling the metallb add-on: microk8s enable metallb.
- Find the MLflow server service:
kubectl get services -A | grep "mlflow-server"
This will return the ClusterIP.
- Change the type of the service from ClusterIP to Load Balancer.
kubectl patch svc mlflow-server -p '{"spec": {"ports": [{"port": 443,"targetPort": 5000,"name": "https"},{"port": 80,"targetPort": 5000,"name": "http"}],"type": "LoadBalancer"}}'
- Get the external IP address from the newly created Load Balancer. (It’s the same as in step 2.)
kubectl get services -A | grep "mlflow-server"
Use the IP to access the dashboard. Now that you have the external IP, in a browser, go to http://<the external IP>. You should see the MLflow dashboard.
Run an example model with Kubeflow
Temporary workaround for missing pod-defaults
Run the following command to make a copy of pod defaults to the user’s namespace, which is admin following the guide.
microk8s kubectl get poddefaults mlflow-server-minio -o yaml -n kubeflow | sed 's/namespace: kubeflow/namespace: admin/' | microk8s kubectl create -f -
Open the Kubeflow dashboard by going to http://10.64.140.43.nip.io/ and log in with the username and password .
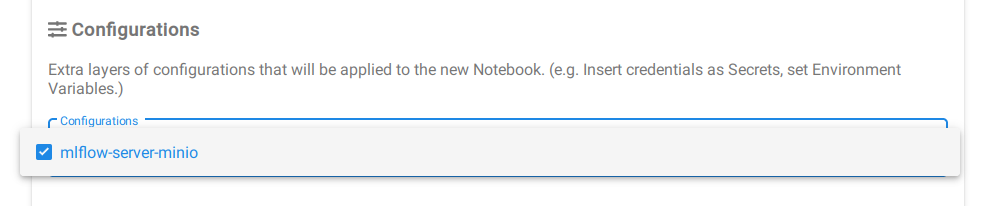
Create a new Notebook Server, taking care to specify the mlflow-server-minio configuration, by ticking the box next to it. This will ensure that the correct environment variables are set so that the MLflow SDK can connect to the MLflow server.
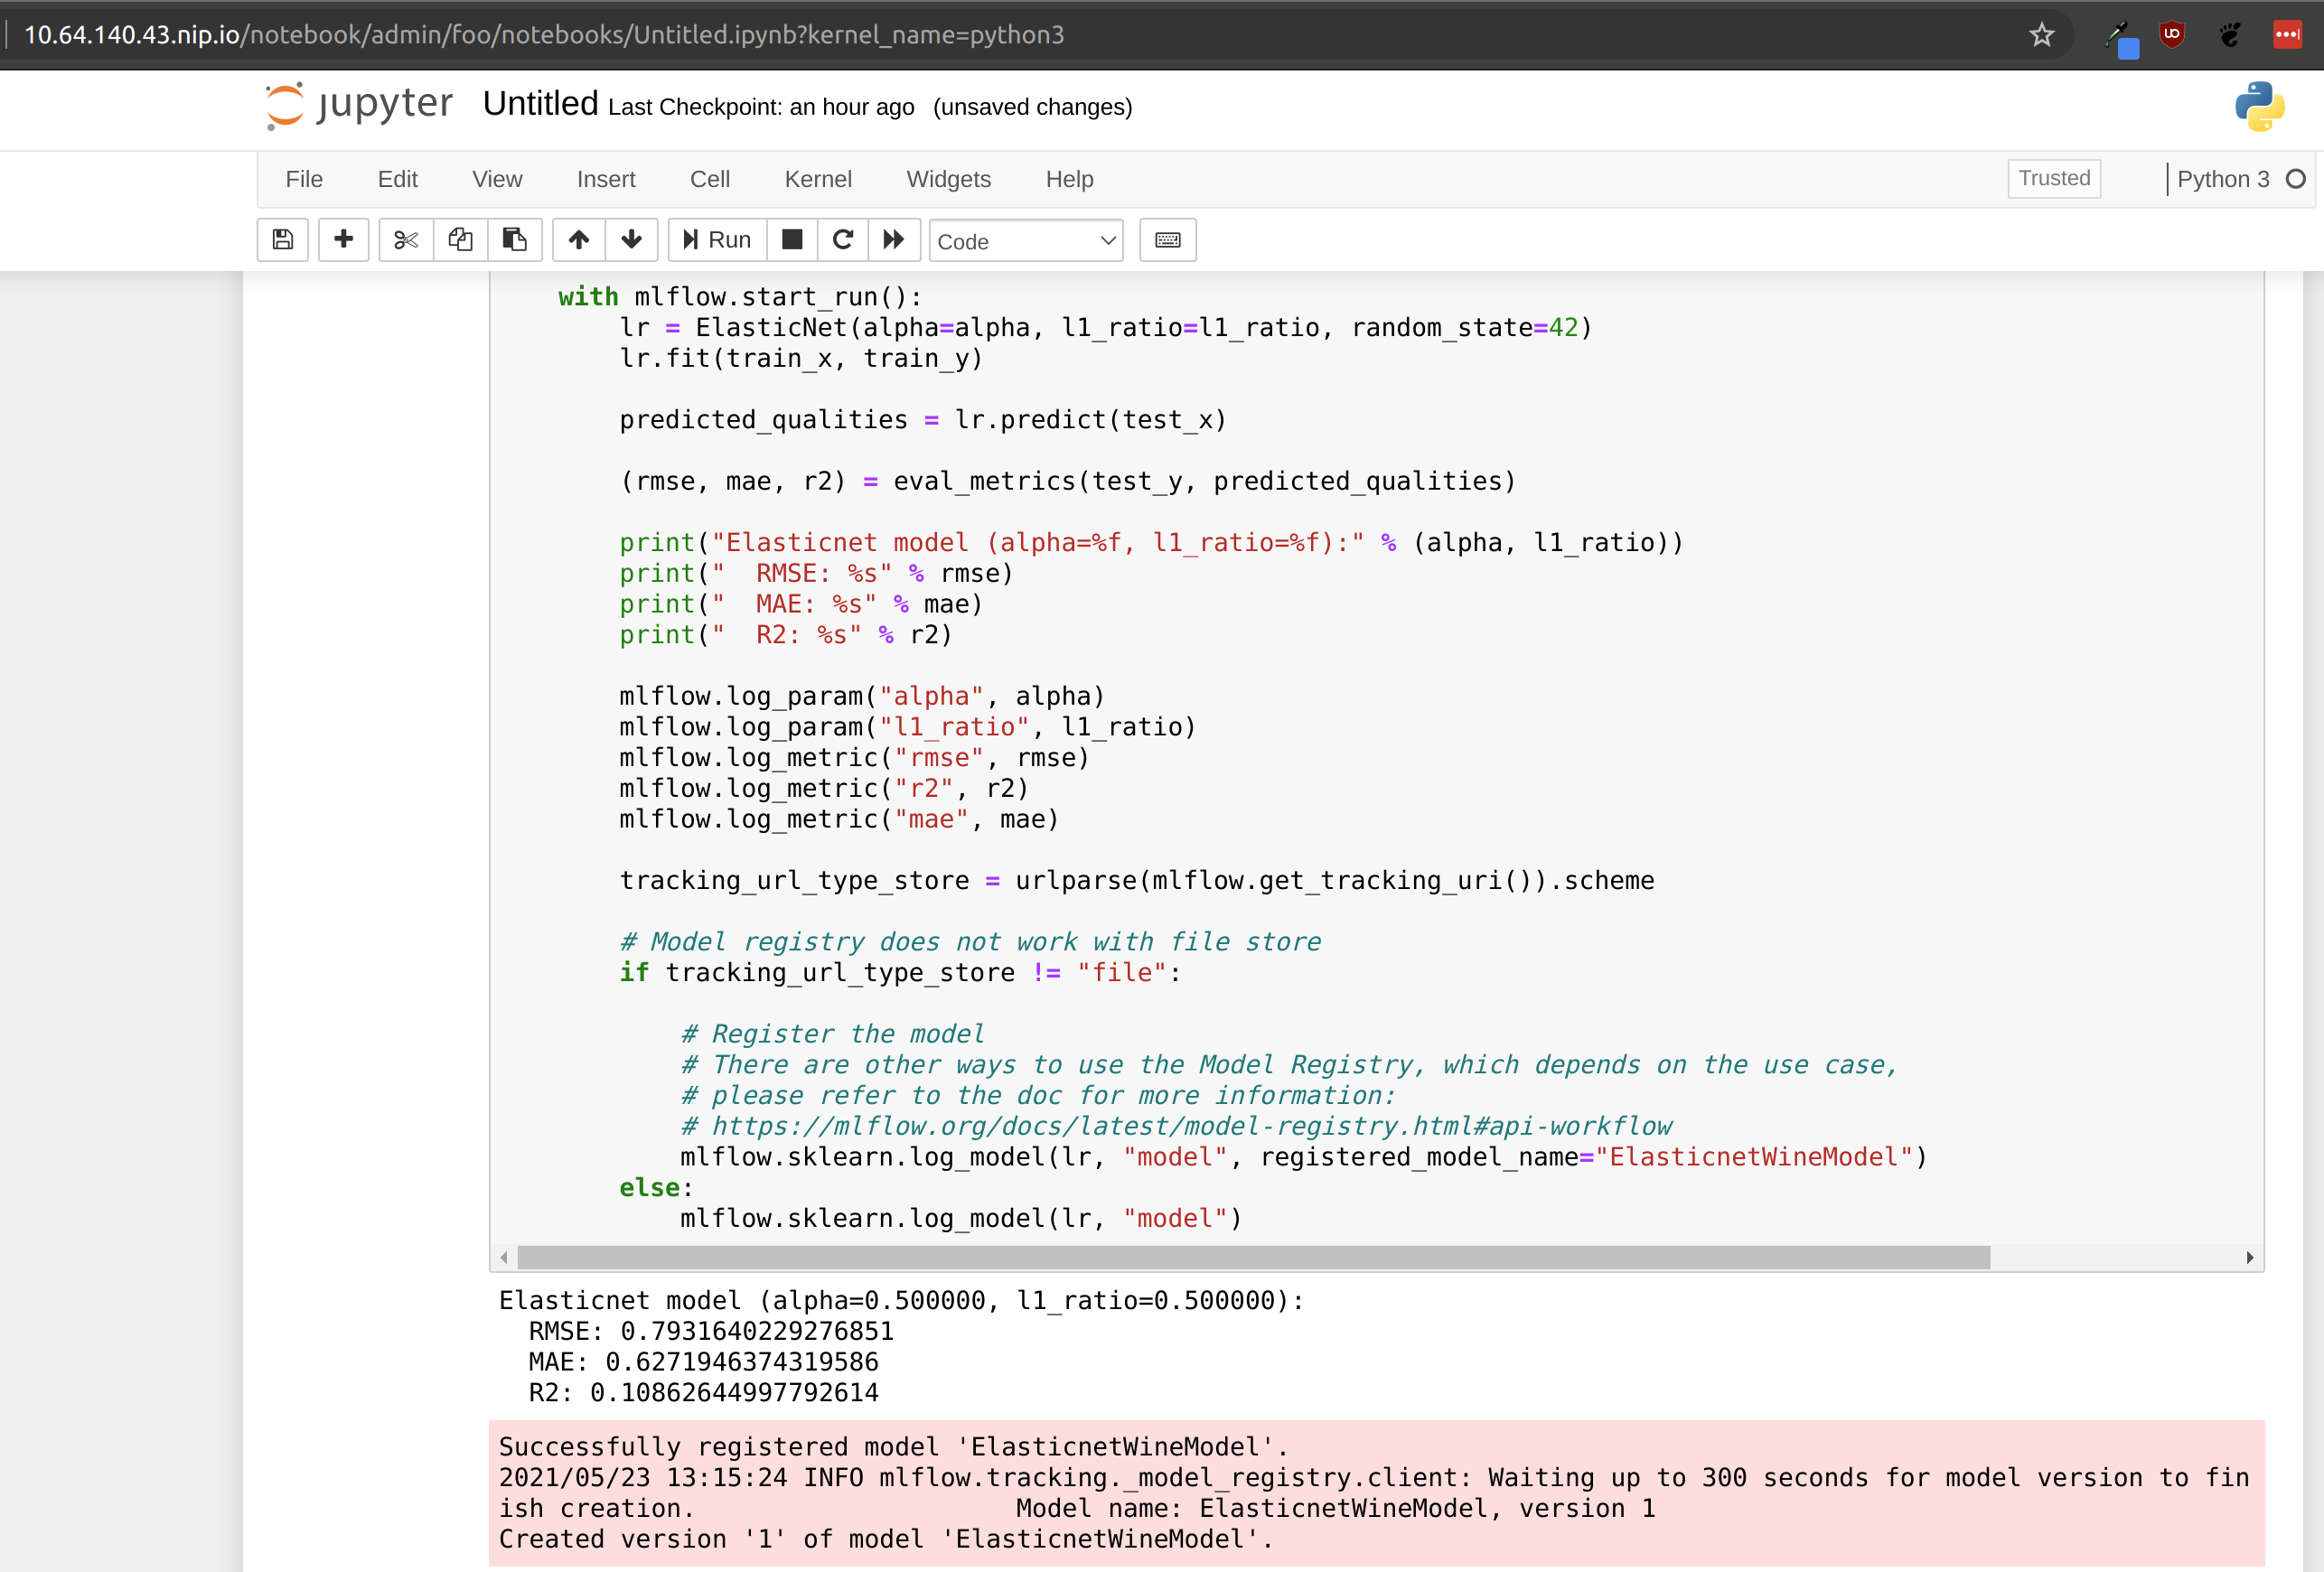
For an example code, upload or paste the Elastic Net wine model notebook to the notebook server.
Run the first two cells and observe that your model metrics are recorded in MLflow as shown in the cell output below. You can see the RMSE, MAE, and R2 for the run model.
Run the third cell to view a list of files in the object storage.
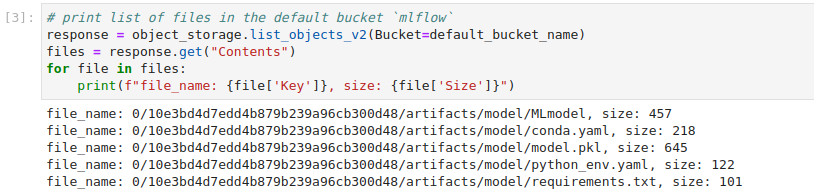
In the last cell, replace <minio file path> with the path of the file you want to download. Use the object path listed in the output of the previous cell, and replace <notebook server file path> with the desired destination file for the downloaded object.
For example to download requirements.txt listed in the above screenshot, run object_storage.download_file(default_bucket_name,'0/10e3bd4d7edd4b879b239a96cb300d48/artifacts/model/requirements.txt','requirements.txt')
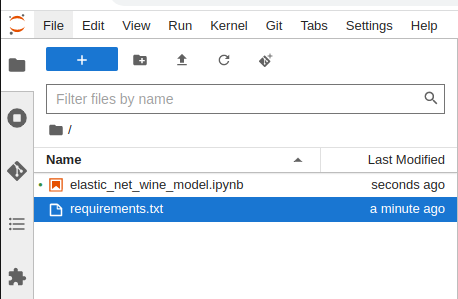
The downloaded object will show up in the file browser on the left.
Access Artifacts
Based on the setup in the Get Started section, Artifacts are stored in MinIO. Artifacts include output files recorded by MLflow runs in any format such as models, data files, and images.
You could access the artifacts using the MinIO client or boto3 with python.
Get MinIO access and secret key
To access the artifacts, you first need to get MinIO access and secret key for authentication.
-
Find admission webhook unit’s name
juju status | grep admission-webhook/copy the unit’s name to use it in the next command
-
Run the command below to get minio envs
juju show-unit <admission webhook unit name> | yq .admission-webhook/*.relation-info[0].application-data
The expected results will look similar to the one below, save your AWS_ACCESS_KEY_ID and AWS_SECRET_ACCESS_KEY as you will need them in the next part to use MinIO client.
pod-defaults: '{"minio": {"env": {"AWS_ACCESS_KEY_ID": "some id", "AWS_SECRET_ACCESS_KEY": "some secret key", "MLFLOW_S3_ENDPOINT_URL": "http://minio.kubeflow:9000", "MLFLOW_TRACKING_URI": "http://mlflow-server.kubeflow.svc.cluster.local:5000"}}}'
Note The environment variables would be the same even if MinIO is not on AWS, it’s based on MinIO’s configuration not the cloud provider.
MinIO client
Install MinIO client following the official guide.
After that set alias for the MinIO.
mc alias set <alias> http://`juju status --format yaml | yq .applications.minio.units.minio/*.address`:9000 $AWS_ACCESS_KEY_ID $AWS_SECRET_ACCESS_KEY
-
List content in the default Mlflow bucket, this will show the files recorded by your MLflow run done in the previous section.
mc ls <alias>/mlflow -
Read the content of a specific file stored in MLFlow during a run.
mc cat <alias>/<path to file>
Boto3
Boto3 is the AWS SDK for Python, it provides a Python API to interact with AWS services.
This code is also included in the example notebook.
import boto3

minio = boto3.client(
        "s3",
        endpoint_url=os.getenv("MLFLOW_S3_ENDPOINT_URL"),
        config=boto3.session.Config(signature_version="s3v4"),
    )
Note: If you are accessing the bucket outside of a Kubeflow notebook server, replace the os env with MinIOunit’s ip with :9000 at the end.
-
Run this in the terminal to get the ip:
echo http://`juju status --format yaml | yq .applications.minio.units.minio/*.address`:9000 -
To list of files in the default bucket
mlflow:response = minio.list_objects_v2(Bucket="mlflow") files = response.get("Contents") for file in files: print(f"file_name: {file['Key']}, size: {file['Size']}") -
To download a specific file:
minio.download_file(default_bucket_name,'<minio file path>', '<notebook server file path>')
For more information, see Boto3 docs
Further Reading
- Create a Kubeflow notebook, Add Kubeflow pipelines, and more in Using Kubeflow tutorial.
- Develop an MLOps Pipeline with with MLFlow, Seldon Core and Kubeflow.